Drills Report Improving Your Quarterbacks Throwing Mechanics
by: Sonny WolfeOffensive Coordinator, McGill University, Canada©
More from this issue
Here are a number of coaching points and drills to help improve your quarterbacks throwing mechanics.
THE THROW (BODY)
The QB should be in a fairly narrow position (feet under the arm pits) to eliminate over striding. He should stand tall with a slight bend in both knees.
Proper transfer of weight is crucial for the QB to throw with velocity.
The QB pushes off the back foot (which should be perpendicular to the target); he takes a short step with the lead foot to the target (or slightly beyond); the hips swing toward the target along with the upper torso, and eventually the arm, all in the same direction.
Balance is regained from the transfer of weight from the back foot to the front foot, when the front foot is planted on the ground. Ensure that the knee of the front foot remains bent throughout the throw.
THE THROW (ARM) FOR RIGHT HANDED QB
Ball in both hands (protect the ball).
Elbows down and shoulders level.
Ball is pushed back in both hands to right shoulder ball is cocked left arm is high across chest.
Release ball and drive left elbow down pulling right shoulder, hips and throwing arm.
High release is critical elbow above the shoulder.
Throwing arm whips forward and rotates across the body to the opposite hip.
Palm should finish down and fingers point to ground.
QBs eyes stay on target not the flight of the ball.
WARM UP / THROWING PROGRESSION
In each of the drills the QBs should be throwing 8-10 balls.
Seated Two QBs seated 8-12 yards apart ball on the ground (to develop ball handling). The distance can be determined by players ages.
Two-knee drill ball on the ground. Both drills help QBs focus on the upper body action of the pass the importance of the chest leading the throwing arm, so that proper thrust is added. Ensure that proper follow through occurs.
Keep feet planted emphasis on shoulder rotation and follow through release ball high.
Right shoulder (left) to partner torque hips and shoulders, but do not move feet - high release, throw like a dart target the throws.
Bullpen like baseball pitcher working weight transfer, follow through with an emphasis on shoulder rotation.
Cross over plant and throw with an emphasis on proper technique and accuracy.
Cross over plant hitch and throw as above.
3 or 5 step drop and throw quick and big, with and without hitch.
Throwing on the Run Diagram 1
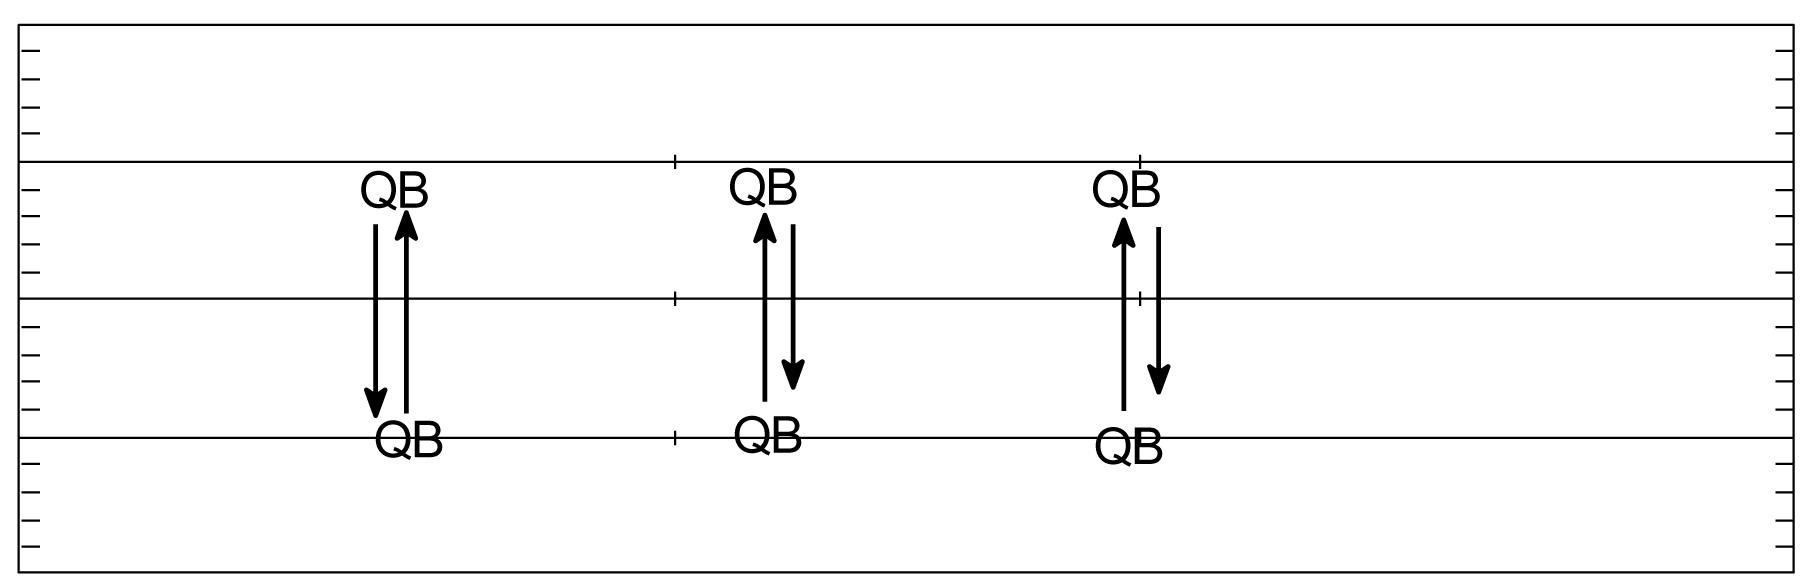
Diagram 1.
Back and forth QBs 15-20 yards apart QB starts forward toward partner striding and following through reduce stride length, ball held (two hands) at pec level throw off front foot. Follow through follow the ball continue to the back of the opposite line.
Circle Drill Diagram 2 QBs run in clockwise and counterclockwise directions a radius of 10 yards and throw on the run work upper body opening hips and maintaining a high elbow despite movement
Diagram 2.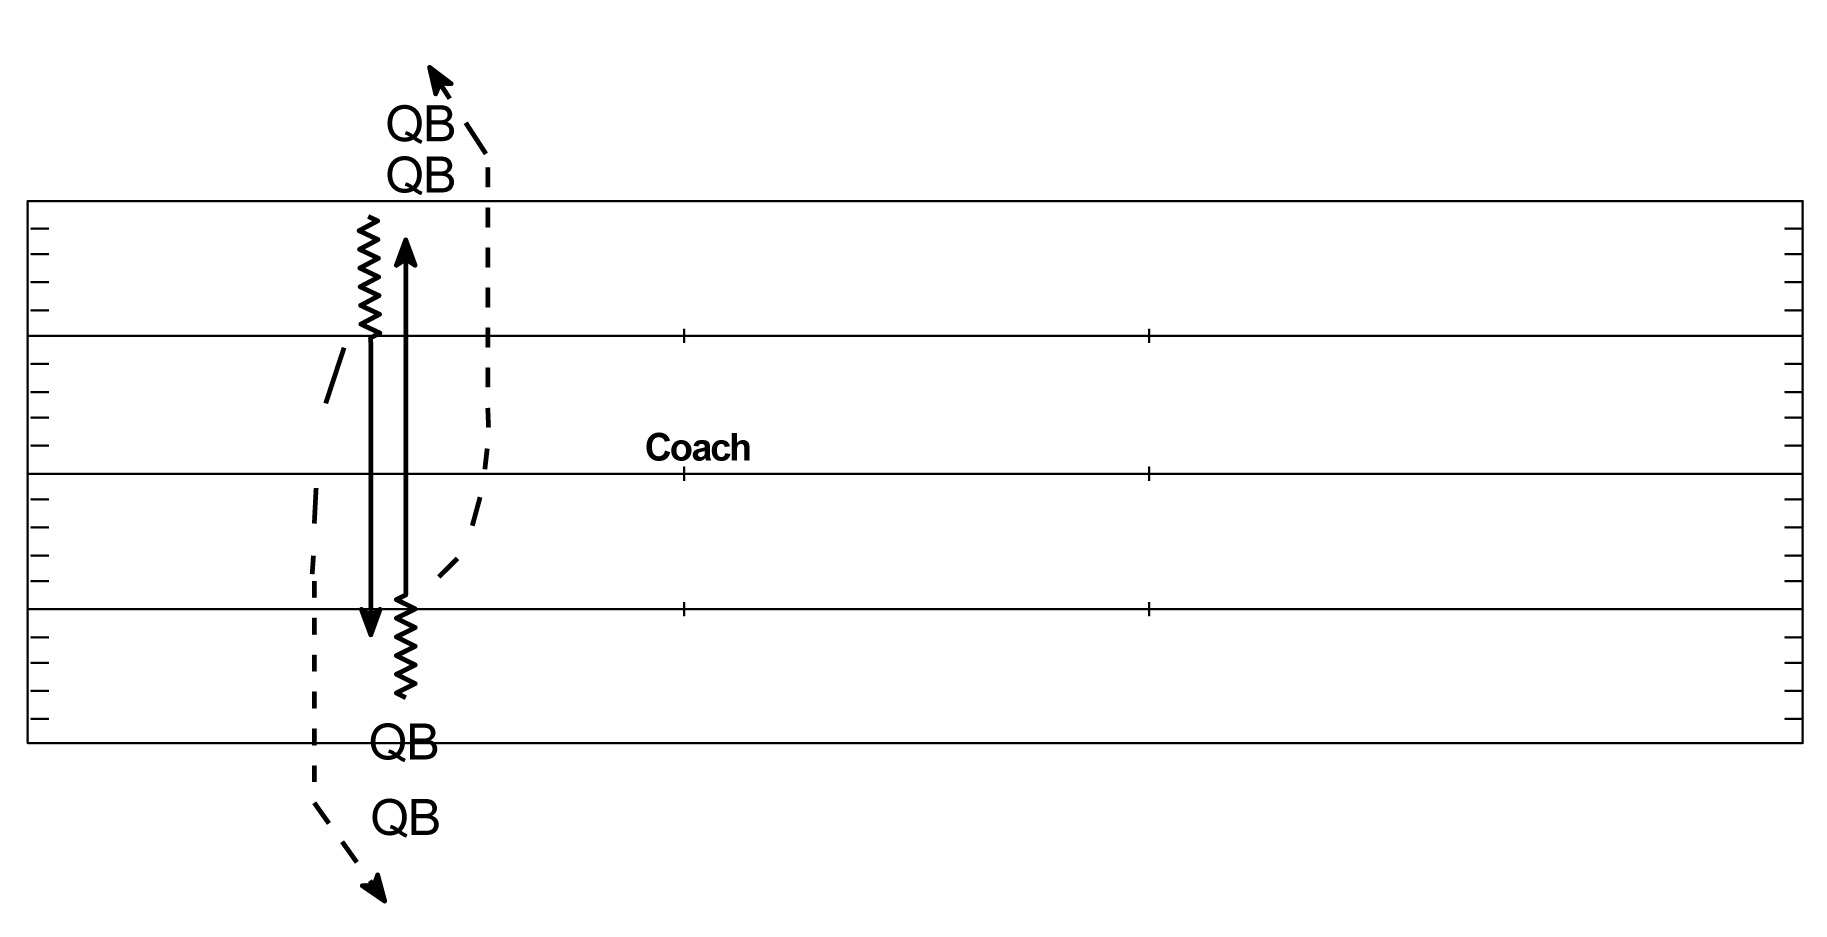
Down the line Diagram 3 - separate QBs by 10 yards working across the field 1st QB takes ball simulates roll out action, he squares his shoulders and comes toward LOS and throws on the move with shoulders square and coming downhill. Second QB repeats repeat drill across the width of the field now work back so each QB gets to throw right and left.
Diagram 3.
Roll Out Drill Diagrams 4 and 5 - Have QBs on opposite hash marks, facing one another 15 yards apart. QBs use roll out, boot or sprint technique and throw to receiver(s) placed close to opposite sideline at various depths. QB follows through and then jogs to the back of the other line.
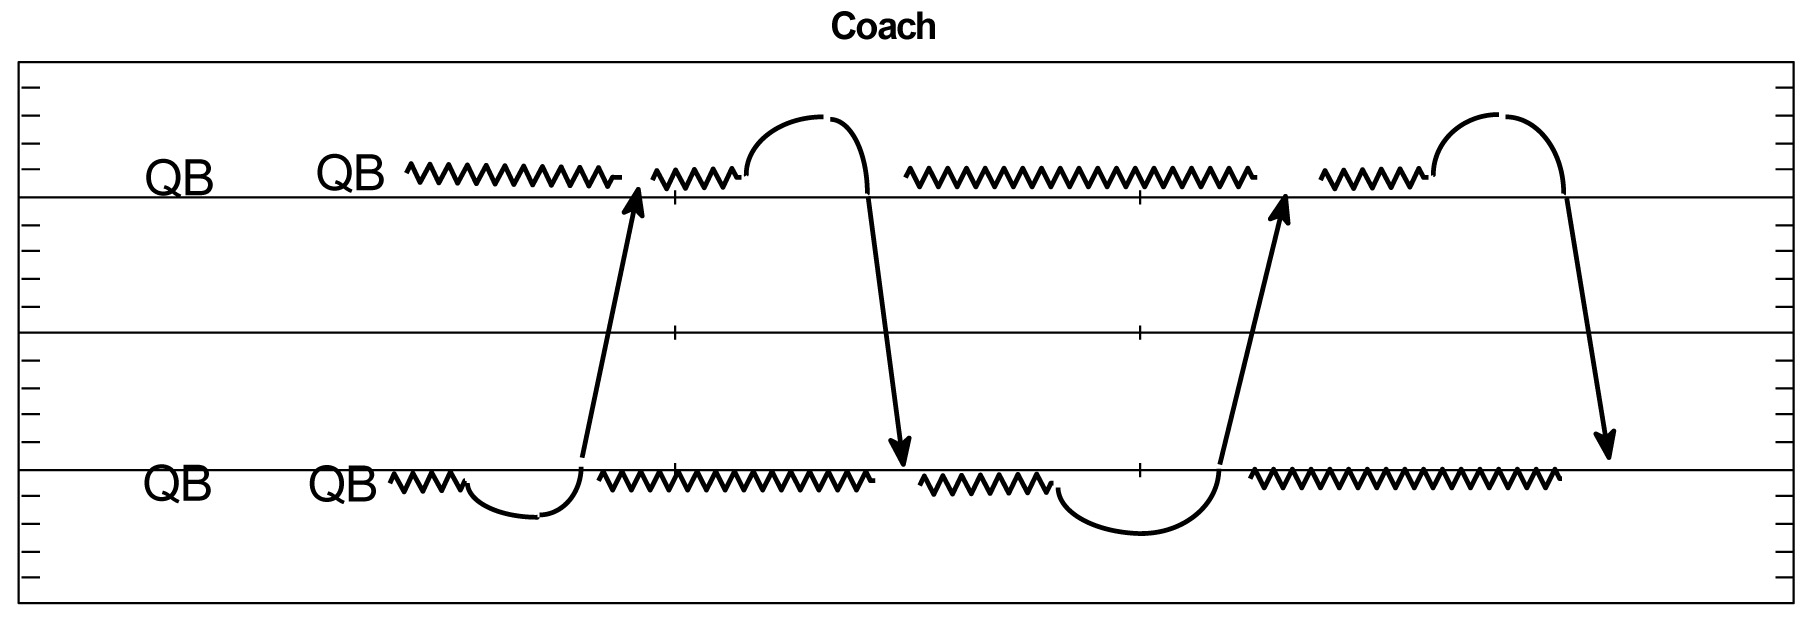
Diagram 4.
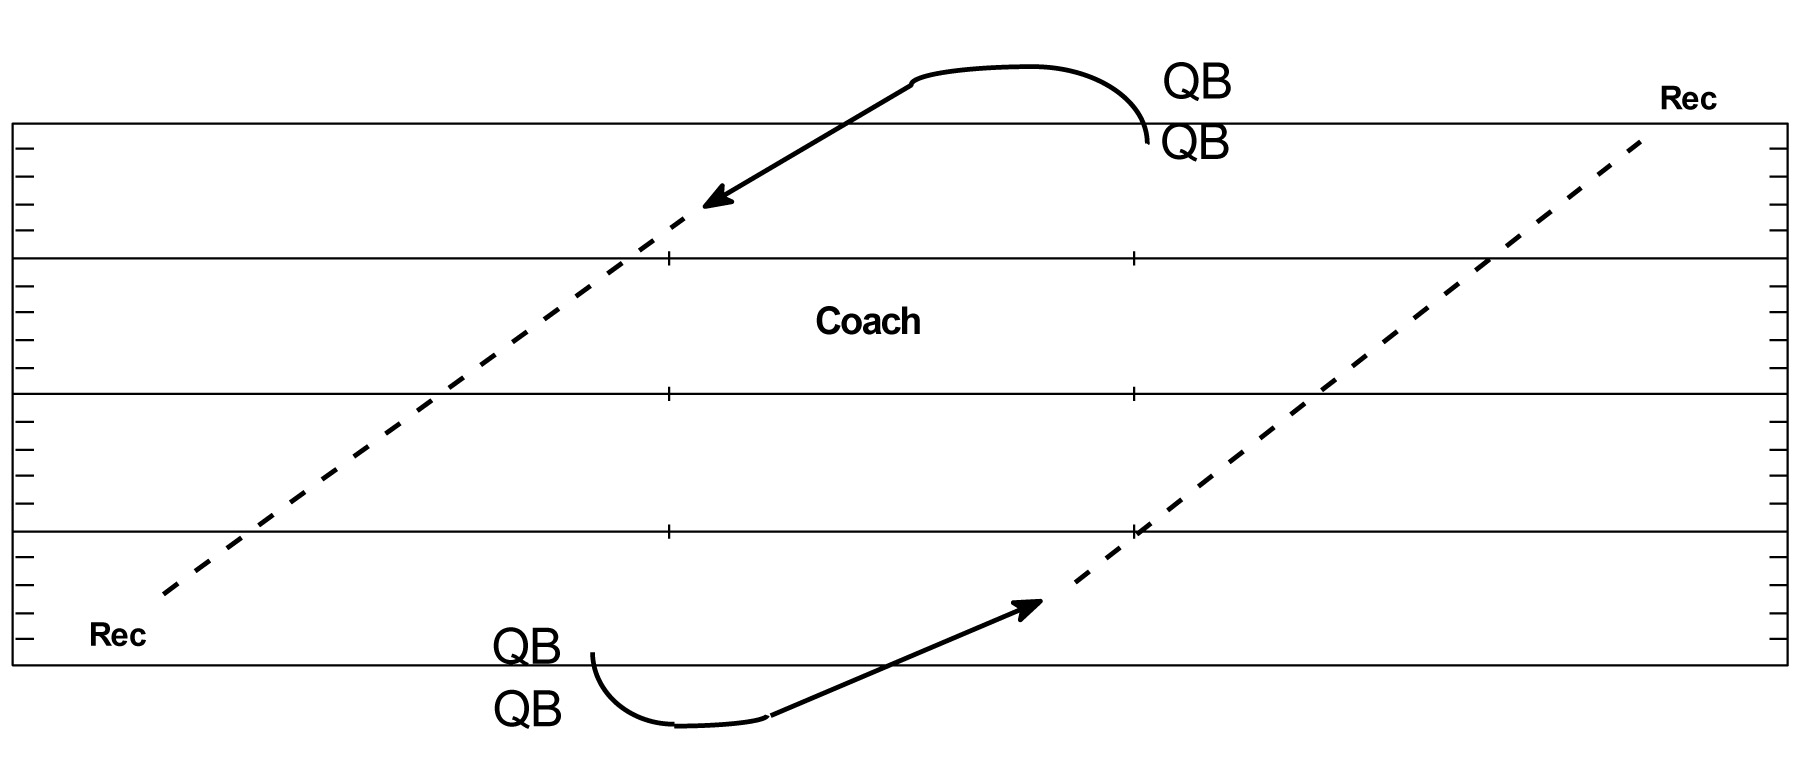
Diagram 5.
Avoiding the Sack Drill Diagram 6 - Align a QB on a yard line and have defensive ends aligned in their normal alignment. The QB drops 5 steps with the coach behind the QB and directs (with hand signals) the DE rush. If the coach directs the DE to contain rush the QB should move up in the pocket. If the coach directs the DE to rush inside, the QB is expected to avoid the DE. This could include running away from defender or spinning opposite the defender. The receivers should be taught scramble rules to adjust to the QBs movement(s).
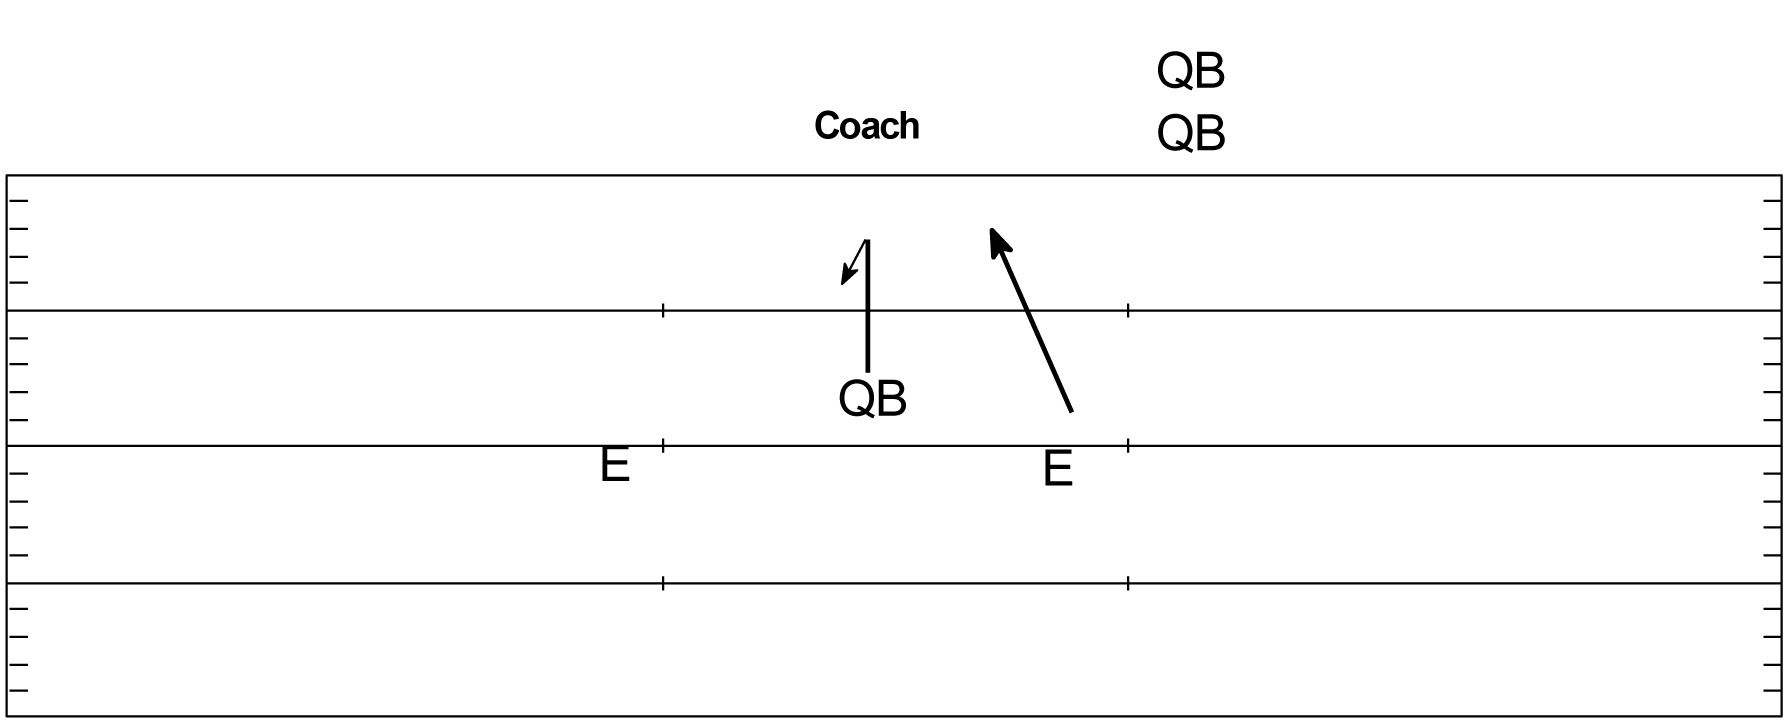
Diagram 6.
The next progression is to place receivers downfield and have the QB either step up and throw, or avoid an inside rush and throw (Diagram 7). For an additional progression, there should be two defensive ends rushing the quarterback.
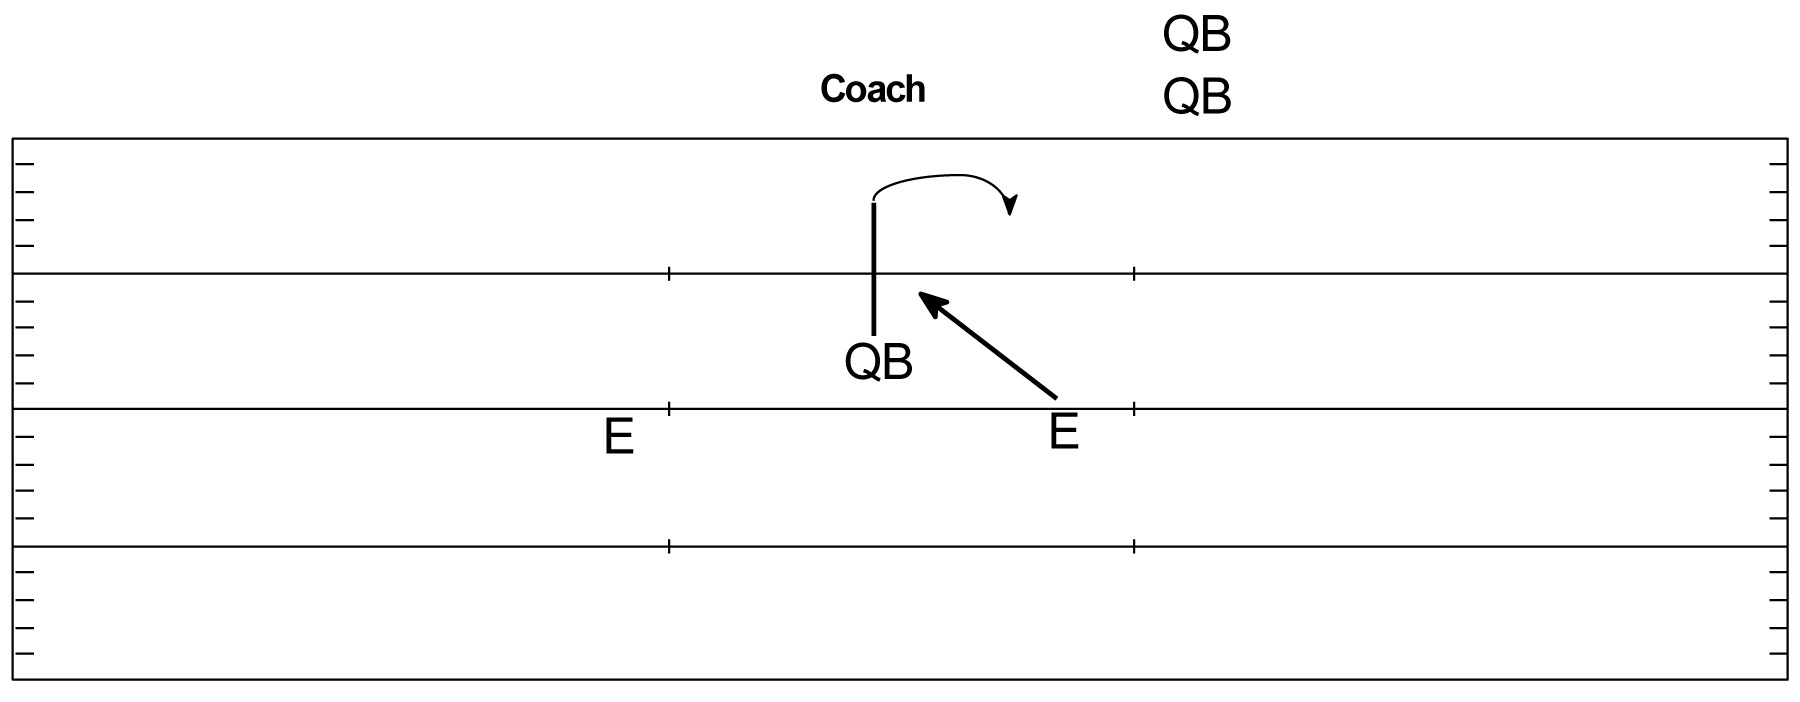
Diagram 7.
We are trying to encourage the QB to make plays with his feet avoid the rush (dont take the sack). He has three options; a) find an open receiver, b) run with the ball, c) throw. the ball away (Diagram 8).
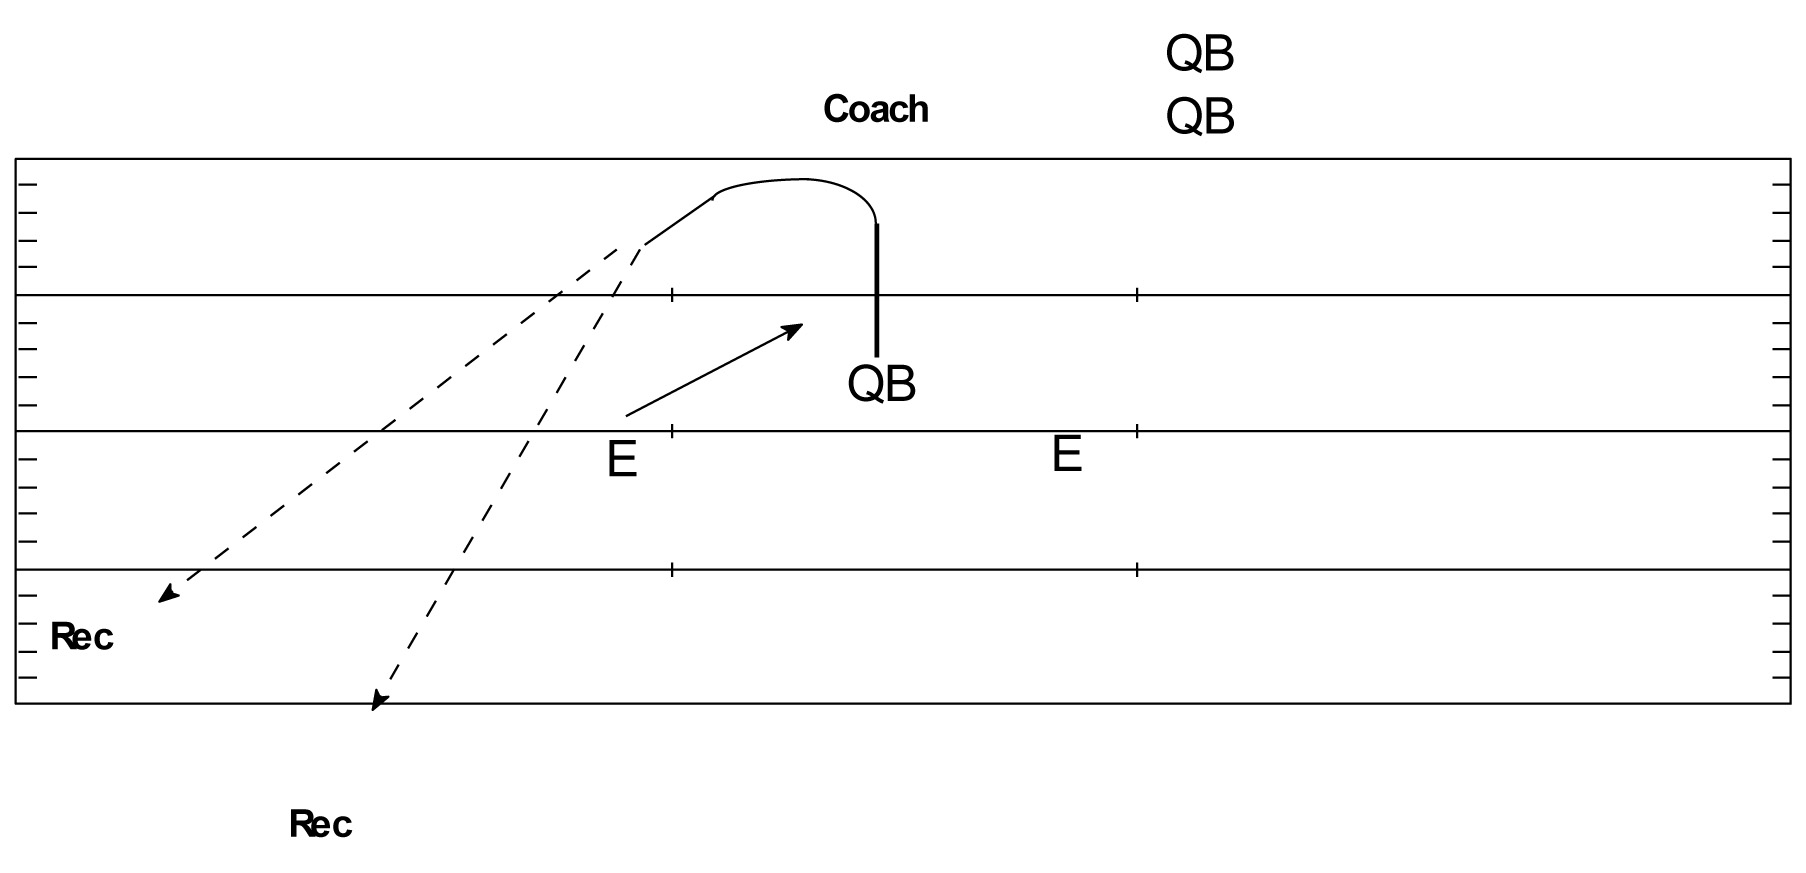
Diagram 8.
A big key is that the QB must feel the rush, not look at the rush.
DECISION MAKING
Align a QB on a yard line. Then, 10-15 yards upfield align two receivers 10-15 yards apart. Have the QB take his drop and throw to the open receiver. The coach with hand signals will indicate which receiver will open his hands to the QB to indicate he is open. It is very important that the QB uses proper technique back foot perpendicular, appropriate lead step, weight transfer, high release, and follow through (Diagram 9).
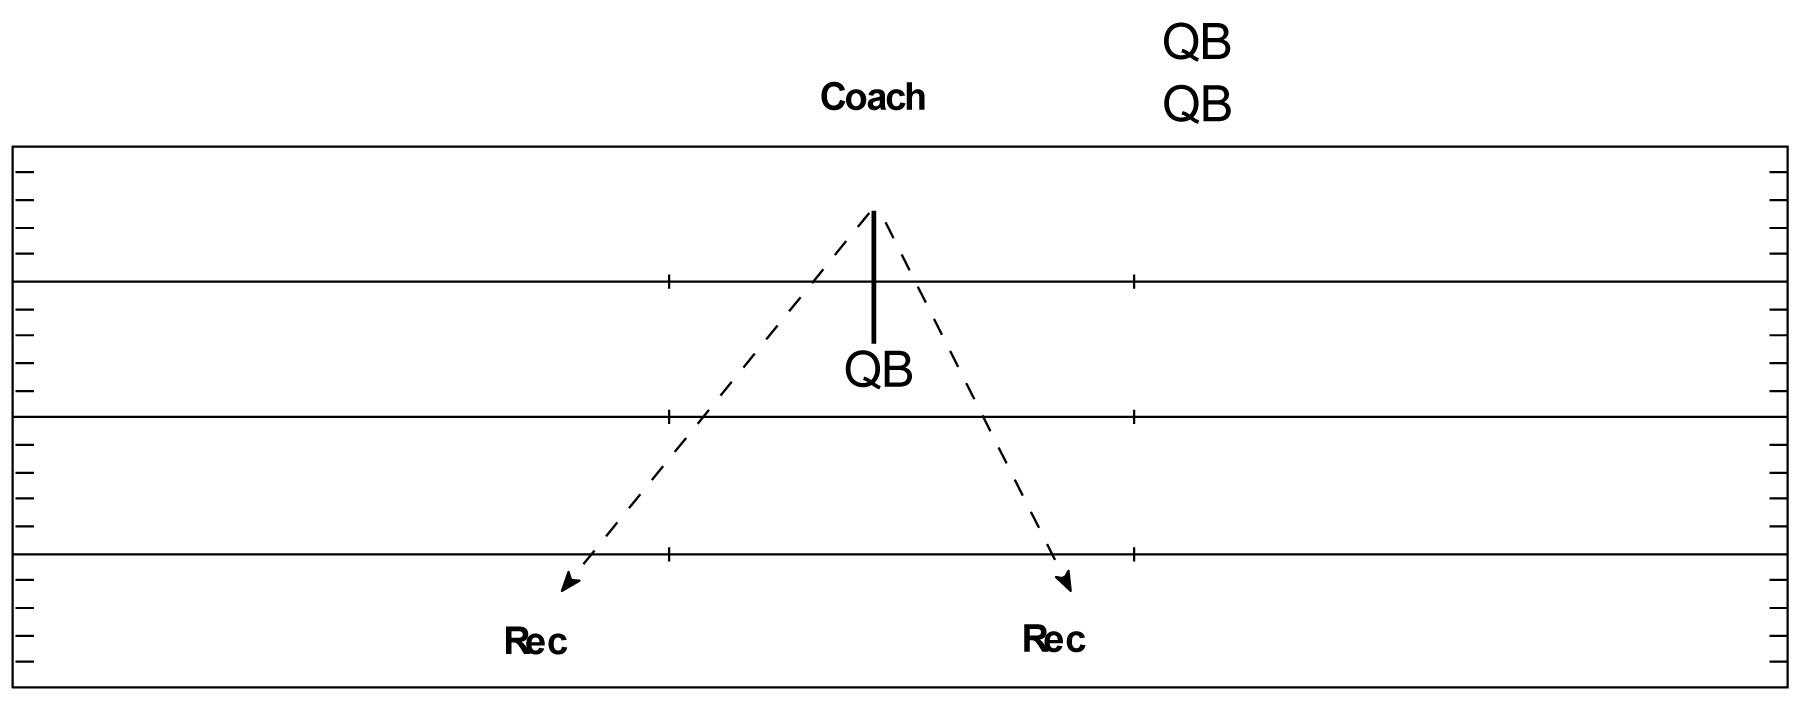
Diagram 9.
The next progression can add a third receiver. The receivers can be placed in appropriate positions on the field to designate a pattern in your playbook (Diagram 10).
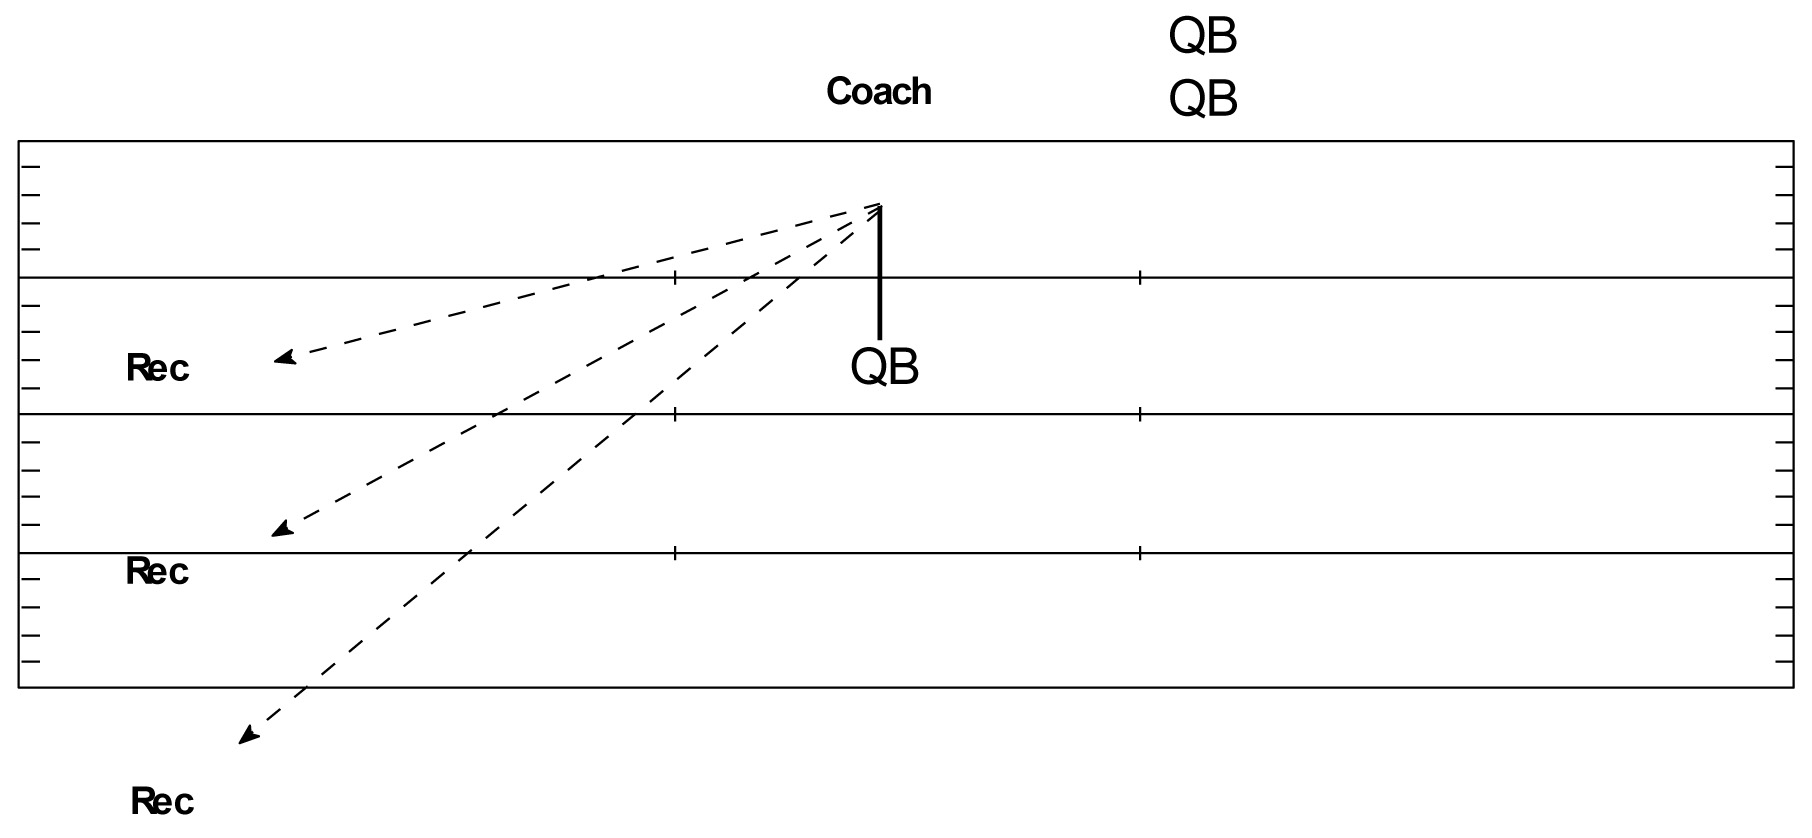
Diagram 10.
The next progression goes back to the diagram 9 drill and adds a defender between the two receivers. This could resemble monkey in the middle. The quarterback should be taught to look off the defender in this drill (Diagram 11).
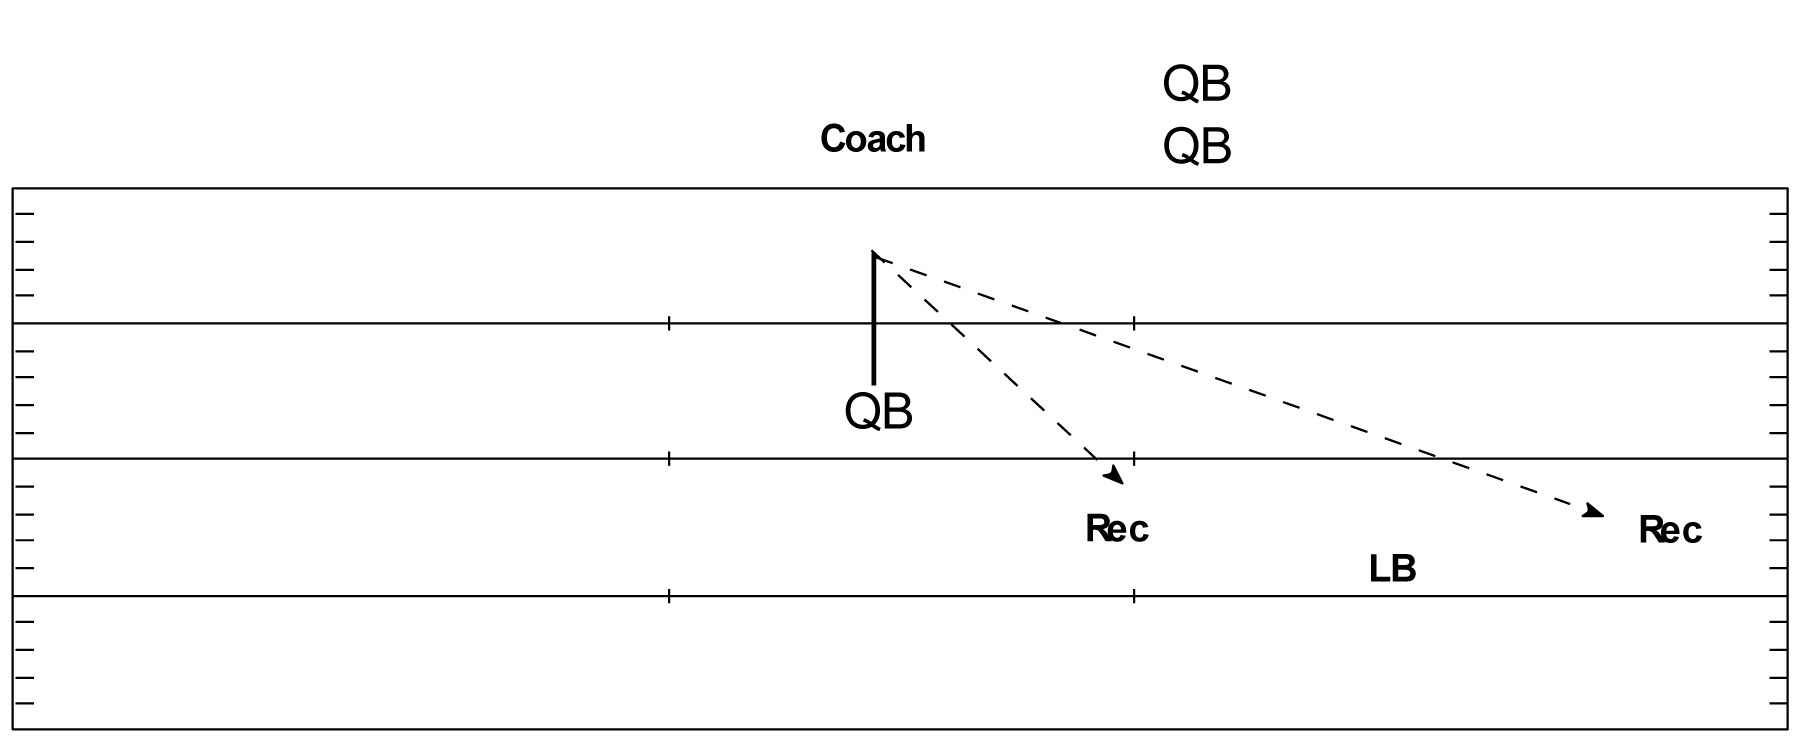
Diagram 11.
The next progression is similar to diagram 10 and adds another defender to make the conditions game-like. You can then add subsequent defenders as the quarterback becomes more proficient in reading the defense (Diagram 12).
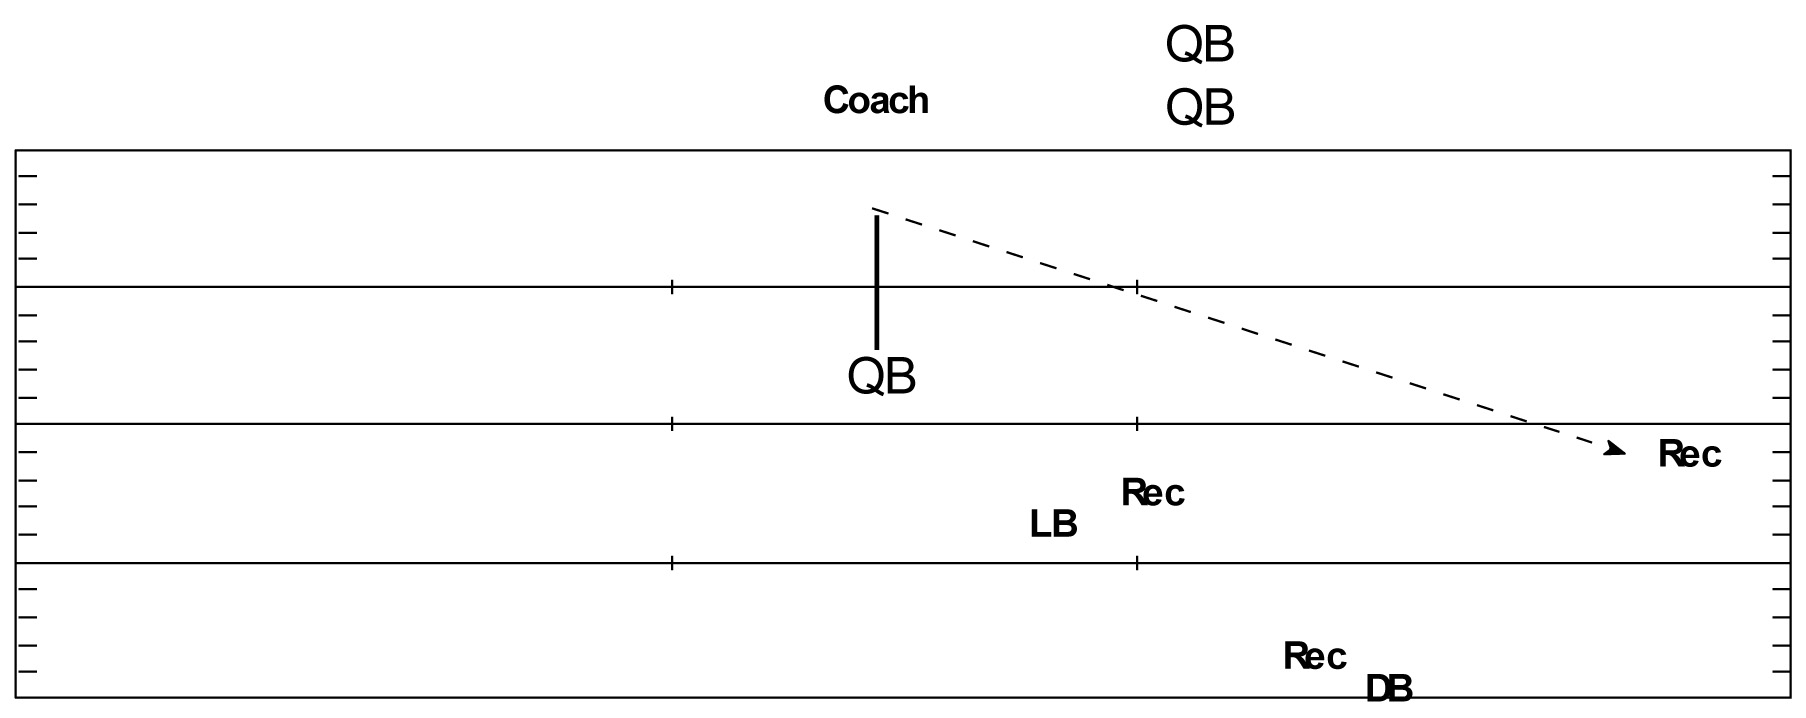
Diagram 12.
Pattern examples vs. one defender could include hitch/corner; curl/flat; and slant/flat.
Pattern examples vs. two defenders could include any triangle, sideline or flood route (i.e., a go, out, or flat route).
About the Author: Sonny Wolfe just completed his first season as Quarterbacks Coach at McGill University in Montreal. He has also coached at Sir George Williams University, Vanier College, Acadia University, St. Francis Xavier University, and the University of Montreal.


 Digital Download - 304 Pages of Football Forms for the Winning Coach