
Article CategoriesAFM Magazine
|
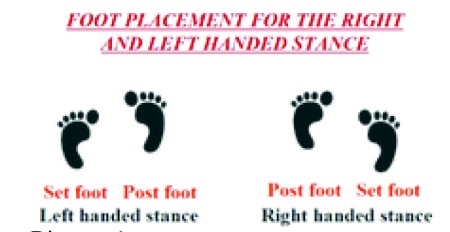
Zone Blocking, Part III Proper Stances and Footworkby: Ken WilmesherrOffensive Line Coach, Grossmont College © More from this issue It doesnt matter what scheme you run if your line isnt fundamentally sound. In Part III of this series, we will cover the stances we use to develop our offensive linemen. As we master our techniques, the stance is the foundation we build great blocking on. You cannot overestimate the importance of the stance. A poor stance equals a poor start. We use both the three-point and two-point stances. Here are the key components of both stances: Rock the weight. Rocking the weight forward slightly provides power-producing angles at the ankles, knees, and hips. Knees are over the toes and hips are over the ankles. The heel of the post foot is slightly off the ground. It is imperative that the knees stay in line with the feet and the hips. On contact, the proper hand and pad leverage must be established and maintained throughout the block. Poor body angles along with poor footwork will defuse the power needed to generate an effective block. A balanced staggered stance is imperative. Therefore, a balanced staggered stance will allow for proper weight distribution on all three points (feet and down hand). Weight and poor angle distribution can be adjusted by an offensive lineman simply shifting his weight.
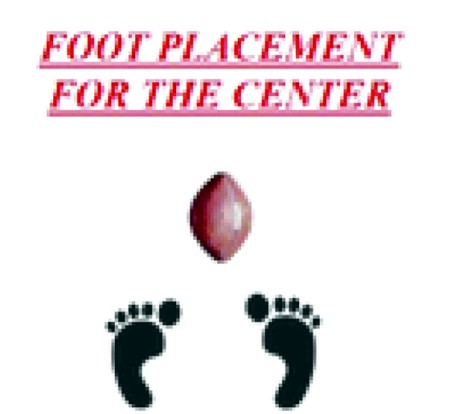
Diagram 1. Two-Point Stance The centers stance is different from his teammates on the line for obvious reasons. His feet are parallel and slightly toed out with the weight on the insteps. This generates power and allows the center to make blocking adjustments. There is a little heel rise and weight is balanced (Diagram 2).
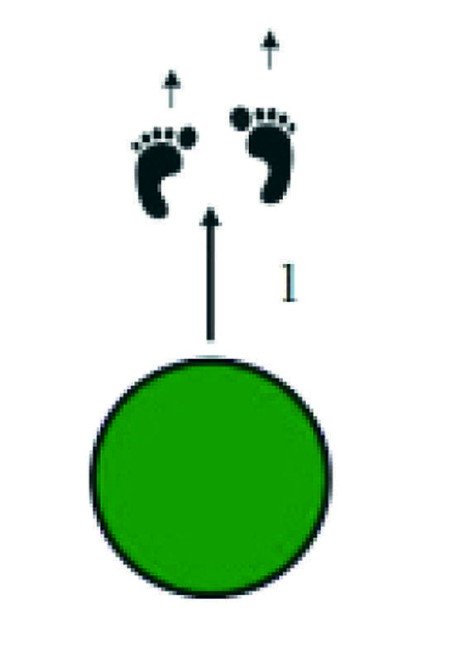
Diagram 2. Stretch the ball out as far as possible. Have the center pick the ball up from his stance. If he cannot pick the ball up, there is too much weight on the ball and the center needs to adjust his weight distribution. Place the thumb on the second lace of the ball. The off hand is similar to that of the other offensive linemen. The elbow of the off hand is placed outside of the knee of the set foot, which will square the shoulders while the hand is relaxed and ready to strike. The center needs to strike with the off hand first because the other hand is used to snap the ball, which puts the center at a disadvantage. The centers rhythm is punch, punch. Defenders will try to attack the snap hand of the center; therefore, he is at a slight disadvantage. Have the center punch with the off hand, or the non-snapping hand first. Then the center will punch with the snap hand. This will be a punch, punch on the defender. Have your center get extra work in early outs on his snapping and his punch, punch. This is a hard technique to master, but through hard work it can be done. Give the centers their own footballs and have them work on snapping, stepping, and punching in your run and pass fundamental periods. An offensive lineman must maintain a balanced staggered stance in both the run and pass game. A balanced staggered stance is key because a lineman must be able to move in many possible directions; right or left from a right or left-handed stance. A balanced staggered stance by an offensive lineman will not tip off his intentions or assignment to the defense. A balanced staggered stance is having the proper weight distribution on all three points the insteps of the feet and the down hand. Here is an overview of the seven direction steps from the balanced staggered stance (Diagrams 3-9). Diagram 3. Drive step or drive block straight ahead from a left or right handed stance.
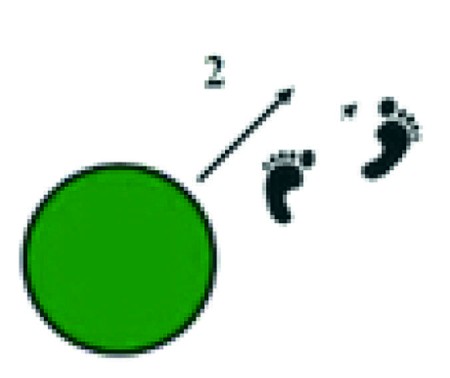
Diagram 4. Down block or angle block to the right.
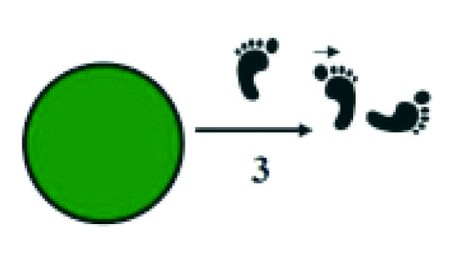
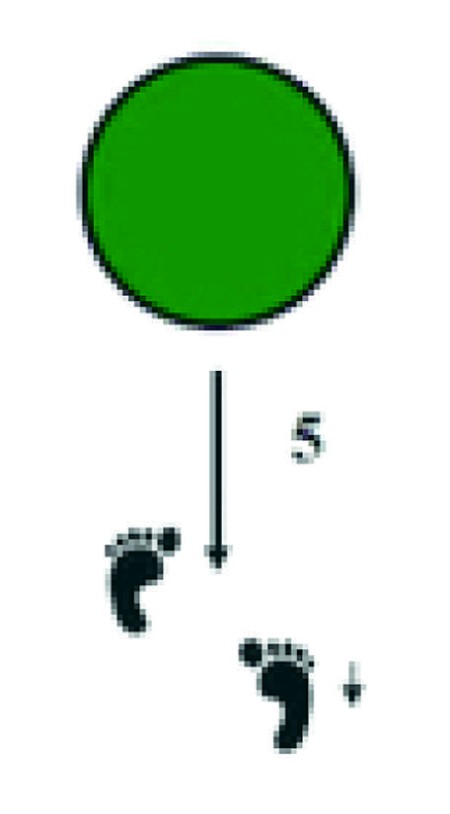
Diagram 5. Lateral jab step, post step with the post foot to the right or a pull to the right.
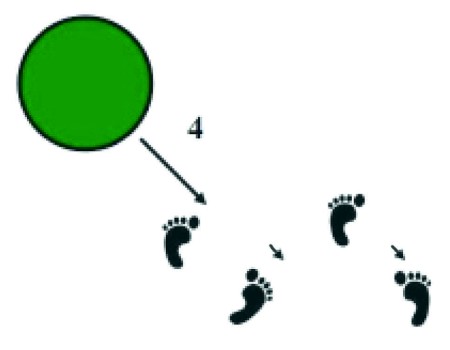
Diagram 6. Bucket step or a kick step with the set foot to the right.
Diagram 7. Straight back or drop cross over to the right or left side from a right or left handed stance
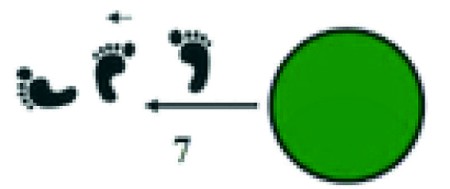
Diagram 8. Bucket step or kick step with the set foot to the left.
Diagram 9. Lateral jab step, post step with the post foot to the left or a pull to the left. Want more articles on this subject? Drills Report: the W Drill for the Offensive Line March, 2010 Looking Back at the Backside Tackle August, 2012 Ken Wilmesherr answer your questions on Facebook - just go About the Author: A frequent contributor to both American Football Monthly and Gridiron Strategies, Ken Wilmesherr is the Offensive Line Coach at Grossmont College. He has over 30 years of coaching experience on the high school and college level. Wilmesheer previously coached at Southwestern College and holds a Bachelor of Arts Degree from Chapman College. |

 Digital Download - 304 Pages of Football Forms for the Winning Coach

|
| HOME |
MAGAZINE |
SUBSCRIBE | ONLINE COLUMNISTS | COACHING VIDEOS |
Copyright 2024, AmericanFootballMonthly.com
All Rights Reserved