AFM RSS Feed Follow Us on Twitter       
AMERICAN FOOTBALL MONTHLY THE #1 RESOURCE FOR FOOTBALL COACHES
ABOUT |  CONTACT |  ADVERTISE |  HELP  


   User Name    Password 
      Password Help


Article Categories


AFM Magazine

AFM Magazine


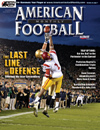
Shore Up Your Secondary – AFM’s compilation of tactics, drills and strategies to make your secondary your primary line of defense.

© More from this issue

Click for Printer Friendly Version          

If you’re heading into post-season play, you’re likely to face a situation where your defensive backfield is forced to come up with a big play. If you’re ahead late, your secondary will be tested in coverage when your opponent goes to the air game. If you need to get the ball back to mount a last-minute offensive of your own, you’re going to need your defenders to prevent the other team from getting game-clinching first downs. Either way, your secondary can mean the difference between your team advancing or going home.


Is it too late in the season to implement new tactics that can help maximize your players’ performance on the field? According to four collegiate D-backfield coaches that AFM spoke to, it’s never too late. Here, we present their easy-to-implement late season strategies and drills that can help your secondary become your primary defensive weapon.
First, Defensive Backs Coach Marco Butler of Norfolk State demonstrates how press man coverage can disrupt an opponent’s passing attack. Following this, Secondary Coach Brian Bell of Minnesota State–Mankato then gives us four simple but effective drills that reinforce fundamentals of defensive back play. Innovative drills are important to Coach Butler. “I try to get my players to understand that you need to work on something each day to improve your play,” he explains. “It doesn’t matter how well you played last week. You can always get better at something. You can only get better or worse.”


Michael Harrison, Defensive Backs Coach at McKendree University provides tactics for adjusting your Cover 2 defense to counteract a sophisticated passing attack. Coach Harrison adjusts his weekly practice strategy as well as the season progresses. “At McKendree, we believe it is all about making your drills as game-pertinent as possible,” he said.

“Especially later into the season, we really try to simulate exactly what our athletes are going to see in the game in each of our drills. If that means we have to implement a new drill then that’s what we do.”


Finally, Coach Lee Calland of Tennessee State, who spent ten years in the NFL including time with the famed “Steel Curtain” and “Purple People Eaters” defenses, covers the fundamentals of good tackling for safeties – something that might save your season.


PRESS
Marco Butler
Defensive Backs Coach
Norfolk State University

Here at Norfolk State University, our defense is multiple out of a 3-4 alignment. We are able to implement several different coverages and looks for an offense to figure out during the course of a game. When you become good at press man, you can give the illusion of man-to-man coverage, or bail out and play different zone coverages. We like to incorporate press man because we want to dictate to the receivers where we want them to go. Our goal is to not let the offense get comfortable and do whatever they would like to our defense.

Why Should You Press?
The first reason that we play press man coverage is to disrupt the timing of the passing game of the opponent. Many offensive passing games are built on receivers being at a certain depth and spot on the field. When a QB reaches his drop, whether it is 3-step or 5-step, he expects them to be there. When you are playing press man, you are already in the face of your most immediate threat on offense. It limits different moves that the offensive player can make to try to get open.
When you are playing press man, it makes the receiver work hard to get a release and get to their proper depth of their route. If you can get a good collision and hold the receiver at the line, the QB will usually panic and have to go to his next read. The offensive player usually runs his curl route for a first down at about 12 yards. He may get jammed at the line and cut his curl route to nine yards. The defensive back has just done his job and disrupted the offensive play.

“If you jam the receiver, you can disrupt the timing of the play.”

Another great reason we press is so that our pass rush takes over. As stated above, we have many different looks out of our 3-4 defense. We may be playing man while utilizing blitzes or we may be trying to get an extra guy in the box for run purposes. When a DB gets a good jam and takes away the QB’s first and second read, the QB will start to panic and scramble around. The pass rush will ultimately get to him and create a successful play for the defense. In order for defenses to be productive, the secondary and pass rush must work together effectively.

Route Prevention
When we play press man, we try and take away certain routes from the offense. The objective is to keep the receiver from entering the QB’s window of vision. In an ideal situation we want the QB to throw a fade route to the receiver. The fade route is the lowest completed pass in football. Our defensive alignment can change based on the receivers alignment. An example would be if a receiver lined up on the numbers or if he lined up tight inside of the hashes. Ultimately, we want to try and force the receivers to release on our outside. Our goal is to have our body between the QB and the receiver. If a receiver tries to release inside of us, we want to flatten him down the line, thus preventing a vertical release.
As a defensive backs coach, I try to teach my players that, once the ball is in the air, you are both receivers. We try to create turnovers each practice and each game, whether it’s a fumble or an interception. If you have done your job and jammed the receiver, you can disrupt the timing of the play. The QB may throw a bad ball, giving you the advantage and chance for an interception. Everyone needs to convince their players not to be afraid to make plays on the ball. To be a successful defensive secondary, your players need to attack the ball in the air.

Productive Techniques
How good a defensive back you are is a direct result of how great your technique is. We all try to put our players in position to make plays. I want to share a few of my ideas and techniques that make our defensive backs successful in press man.
Crowd the line - As a DB, you want to crowd the line as much as possible without being offside. It defeats the purpose of playing press man if you can not get your hands on the receiver. When we have two defenders in press man position beside each other, they must be on two different levels. I usually have the defender whose man is off the ball play off about one more yard. This is helpful in preventing your guys from getting picked if receivers cross each other.

Bend in elbows - The next technique we use is to make sure we have our hands up with a bend in the elbows. We concentrate with the bend in the elbows so they will work to keep hands up ready to collision. A lot of players will start out with bad habits such as dropping their hands when receivers come off the line. A majority of time if we don’t get a jam it is because someone dropped their hands. This is a skill I speak to my guys about on a daily basis.

Eyes, hands and feet - To be successful in press man, your eyes, hands and feet must all work together. We concentrate our eyes on the waist of the receiver. A receiver can do several head fakes, but his waist will take you to where he is going. We also want to jam the receiver with one hand under the shoulder pad to knock them off balance. We aim for the pad that is going away from us. An example would be the right hand on the right shoulder pad facing us. I also teach my guys to take small gather steps, just to get their feet moving. You can try collision, but if your feet do not move, you will not slow the receiver down. These are the main techniques we concentrate on in practice whether it is 1-on-1 or a team period.

Drills
Arm-on-Air - One of the first drills I start with involves getting everyone lined up individually, working on their hands and feet. Each player has to work on getting into a comfortable stance. I will tell them which hand we are jamming with, and they will react when I blow the whistle. They have to punch and move their feet simultaneously. We repeat this drill using both hands.

The Sled - The next drill I work on is on the 1-man and 5-man sled. I use the sled is because I want them to be physical and punch through the receiver. On the 1-man sled, I will stand behind it and move it to the right or left. The sled is representing a receiver, and they are seeing the receiver move right and left. They concentrate on punching with the correct hand. We will then go to the 5-man sled with five players lining up in front of the sled. On the whistle they will punch with either their right or left hand. Here they concentrate on keeping their thumb up and punching the pad up. Next, we will line up one at a time at the end of the 5-man sled. We will go down the sled, punching with our right hand. We will then repeat the drill with our left hand on the other end. This helps with our collision in addition to keeping our feet moving.

Partner -The final drill we do is partner up and line up in a straight row to work on all our techniques together. I will stand behind the defenders with a whistle and tell the receivers which way we are going. We try to implement everything that we have worked on together to get better at press coverage. It is better to correct things with your defensive backs before you go with your receivers in practice.

Marco Butler is in his fifth season as Defensive Backs Coach at Norfolk State University. He previously coached four seasons at Fayetteville State University.  


DRILL

Brian Bell
Secondary Coach
Minnesota State
University-Mankato

Change Of Direction
Purpose: To reinforce low pad level while changing directions at multiple angles.
Drill: Five cones set up coming out of the sideline. Four are set up in a 5x5 box and the final cone is set up five yards on either side. DB starts on the designated cone, facing the coach. On the cadence “Set Go”, the DB backpedals until the cone is in his vision line and breaks at a 450 angle to the next cone. Once at the next cone, he opens his hips and sprints with his eyes at the coach. Coach gives a signal for DB to sprint to the starting line, with or without ball, completing the drill. To work the drill in the opposite direction, simply move the cone that is not part of the 5x5 box to the other side.


1/2 and 1/3 Profile Tackling
Purpose: To teach proper angles of tackling, coming to balance and drop weight when tackling/tagging off.
Drill: Coach is aligned in the middle third of the field, with one WR for safety aligned two yards outside the hash, and one WR for corner aligned two yards from the top of the numbers. Corners should be aligned in a cover 3 type alignment. Safeties can be aligned at a cover 2 or 3 alignment. On cadence “Set Go”, the safety backpedals. The ball is thrown by coach to the WR running a bubble route. The safety breaks with inside-out attitude on the receiver, attacking his inside leg. Coaching points for the safety: finish inside-out, running a banana-shaped angle, and close space with active feet. For corners reps, on cadence “Set Go”, the Corner backpedals. The ball is thrown by coach to the WR running quick hitch. The corner breaks with outside-in attitude on the receiver, attacking his outside leg. Coaching points for the corner: finish outside-in, closing space with active feet and ten other teammates pursuing inside-out. This drill can also be executed using 2 DBs vs. 1 WR or 2 DBs vs. 2 WRs.


6-Cone Breaks
Purpose: To teach fundamentals, improve driving at multiple angles (0°,45°, 90°), change of direction, communication and training eyes.
Drill: Six cones set up in the middle of an outside third of the field, two at 5 yards, two at 10 yards, and the final two at 15 yards. DB or DBs start at the first set of cones, facing the coach. On the cadence “Set Go”, the DB backpedals until coach gives him a visual stimulus to break angle. Setting this drill up near the sideline is ideal because you have your out/in/post/corner routes directions predetermined. Coach should allow DBs to pedal close to the middle of the cones. Once the stimulus is given, DB calls out route “OUT” and simultaneously snaps his eyes in the direction of the route given.


Hash Breaks
Purpose: Read QB while playing the deep middle 1/3, holding pedal as long as possible while splitting threats and playing the deep ball.
Drill: DB aligns 10-15 yards. Receivers are aligned 2 yards outside each hash. On the cadence “Set Go”, the DB backpedals and receivers sprint straight down field. Coach gets into a 5-7 step drop and over exaggerates his intentions (shoulders and eyes) on which receiver you want to throw to. Once the pass is thrown, with lots of air under the ball, the DB’s first two steps should be directly at the receiver. Then he locates the ball. The DB should attack the ball at the highest point, and receiver should not attempt to jump and catch the ball. To increase the difficulty of this drill, widen receiver’s alignment from the hash, look the DB off and comeback to the other receiver. Coaching point: Do not over-commit to either threat. When the quarterback’s front hand comes off, that is his intention and his shoulder angle will tell the intended ball projection.


ADJUST
Michael Harrison
Defensive Backs Coach
McKendree University

McKendree University is primarily a Cover 2 team. Today, however, quarterbacks at all levels can read defenses and know where to deliver the ball when they recognize a standard Cover 2 zone. Therefore, we use variations and adjustments to stay in our Cover 2 zone scheme.
As a coordinator, it is necessary to establish a philosophy, then build the base defense around that philosophy. McKendree’s philosophy is to put our athletes in position to play fast and to make plays. In our Cover 2 package, the “Base” technique is taught with the goal of getting our players in the correct position to make a play in any situation.
In our Cover 2 packages, our OLBs are hook-to-curl players. They are heavy run players and are not expected to carry the #2 receiver vertically. Their primary pass responsibility is to wall the # 2 receiver outside to the hook area, then level with any receiver that crosses his face to the flat (Diagram 1). Depending on the down and distance, our LBs understand how involved they must be with our zone coverages.

In our “Base” Cover 2 adjustment, the corners align 7-9 yards deep with outside leverage on the #1 receiver and the safeties align 12 – 14 yards deep and 2-3 yards near or on the hash marks. On the snap of the ball, the corners and safeties initially have to give ground to get their reads. Both the corners and safeties read the #2 receiver to their side. This is the most important concept for our defensive backs to understand and they must master this concept before we can install our other adjustments.
If the #2 receiver runs any type of vertical route (post, seam, corner, etc.) the safety must take him. If the #2 receiver does not go vertical, the safety gets off the hash marks and finds the #1 receiver. The corner has similar reads to the safety. If the #2 receiver goes vertical, the corner must get a jam on the #1 receiver, forcing him inside, then trail the #1 receiver with inside leverage to take away the throwing lane of the QB to the #1 receiver (Diagram 2). If the #2 receiver does not go vertical, the corner jams the #1 receiver, forcing him inside, then plays the first threat to his flat. If the #2 receiver is releasing to the flat, it is easy for the corner to take him. If the #2 receiver goes away, the corner must squeeze the flat area down to shorten the flat area for a receiver crossing the field or a back releasing from the backfield.

We call this our “Base” technique. It is essential that the corner and safety get the same read from the #2 receiver and are on the same page. If not, you may have a receiver running down the middle of the field wide open. The way we prevent this is by asking the safety to communicate the route of the #2 receiver and the corner to communicate the route of the #1 receiver. There are five reads that our entire defense uses to communicate the area of the field the receivers are running to: 1, Out – any route to the flats area, 2, Up – any vertical route up the field, 3, In – any route to the middle of the field safeties (post, seam), 4, Under – any route under the Linebackers, 5, Crosser – any route behind the linebackers. Each of our defenders uses these calls to communicate his read to the rest of the defense and each defender is taught how to react when they hear each call. The corner knows if he hears an “Up” call from the safety describing the route of the #2 receiver, then the safety will stay with the #2 receiver and the corner must trail the #1 receiver vertically. If he hears any other call from the safety, he can be more physical with his jam on the #1 receiver inside and then let him go.
If we are having an issue with vertical routes or really want to prevent the deep pass, we will play our “Loose” Cover 2 package. In our “Loose” package there are two adjustments in the defensive secondary. First, our safeties deepen to 15-17 yards from the line of scrimmage and are flat-footed on the snap of the ball. They are not expected to help on the run much when this adjustment is called. The second adjustment is the most important. The adjustment is the difference in technique by the corner against the double vertical route combination. In our “Loose” package the corner gives ground to stay on top of the #1 receiver vertically. If the corner hears and “Up” call from the safety reading the #2 receiver, he continues in his backpedal or shuffle, staying on top of the #1 receiver until either of the receivers breaks off their route (Diagram 3). This coverage is very effective versus the 4-vertical route combination because it turns into a 4-deep coverage forcing the quarterback to hold the ball and forcing the offense to throw to the short underneath receivers. Against any route combination other than double verticals, the corner plays his “Base” Cover 2 technique.

The third adjustment that we use as a mix-up is the more traditional version of Cover 2. We call this adjustment “Hard” and we use it to take away the quick game and short throws by the offense. When we go to our “Hard” adjustment, our safeties have to get 1-2 yards wider than their normal alignment. Our corners become heavy-flat players and do not give ground. They are responsible for getting a physical jam on the #1 receiver and taking away all vertical releases. The safety can read the #2 receiver longer than he normally does, realizing the corner will not release the # 1 receiver vertically. The corner listens for the route of the #2 receiver from the safety. Similar to his technique in our other adjustments, if the #2 receiver releases vertically, the safety takes him and the corner is responsible for the #1 receiver. We tell the corner he must do whatever he has to do to not let the #1 receiver go vertical. If the #1 receiver gets off the jam of the corner and attempts to go vertical, the corner will get in an inside-trail position to cut off the throwing lane of the quarterback, similar to his technique in our “Base” adjustment. Versus either an inside or outside release from the #2 receiver, the corner is only responsible for getting a hand on the #1 receiver to slow him down before jumping the route to the flat. We call this adjustment “Hard” because the corner is more physical with his technique against the #1 WR and more aggressive against any quick route to the flats. Because this coverage is less effective against vertical threats we will only use it as a variation when we want to be aggressive versus short underneath routes.


TACKLE
Lee Calland
Assistant Coach
Tennessee State University

We emphasize to our safeties that proper tackling is a must. We make certain they understand that they might execute everything else absolutely correctly, but missing the tackle on an otherwise flawless play makes that play unsuccessful.
Keeping this in mind in our meetings prior to going out on the field, we explain the purpose and the “how” of every drill to be conducted. We explain the commands prefaced by “set” as a preparatory command, and “go” as a command to execute. We walk and talk the drill each and every time.
We attempt to simplify the process by categorizing types of tackles into two groups: straight-on and angle. Either type may occur in one or two areas: inside the box or outside the box. To reduce the training process even further, we explain that the ball carrier will be either of the safety’s same stature, smaller, or larger than the safety. Ultimately, using these categories, we explain what adjustments must be made during play to act upon these contingencies.
Once the aforementioned is defined and understood, we are ready to talk to our safeties about the fundamental hitting position as follows:
• Feet are planted under the shoulders slightly wider than shoulder width.
• Weight is placed on the balls of the feet with feet parallel to each other.
• The player must be able to feel his heels touch the turf.
• Good flex must be maintained in the hips and ankles.
• Knees are flexed in line over the toe of each shoe.
• The back is straight and tiled forward at a 10° to 15° angle.
• Arms hang comfortably near the player’s sides with hands one to two inches above and outside each thigh.
• The neck is bowed.
• Head is held up, eyes at the level of the ball carrier’s numbers focused on the numbers.

In our individual period on the field after the hitting position is established, we begin the form tackling drill. We teach one-step explosion with a six-inch rising blow that is designed to redirect (vector) the ball carrier’s forward direction (force) to an upward direction. In actuality, this allows the safety to lift the ball carrier off of the turf.
The power that we get to lift the ball carrier is derived from dropping the hip as the player steps forcefully down into the turf. The player must then uncoil 90° upwards with his arms moving upwards and locking his hand to the opposing wrist behind the ball carrier’s backside. Simultaneously, the player’s chest, the front of his shoulder pads, and face mask lift upwards in one fluid motion. (See Diagram 1)

In teaching the one-step explosion in our form tackling drill, the safeties are divided into a two-line buddy system. Players are placed five yards apart. The ball carriers approach the tacklers at three-quarter speed. The tackler assumes the hitting position, maintains his location, and begins chopping his feet. At the proper distance, the one-step explosion is executed. This step is no more than 12 inches in length. The tackler executes the one-step explosion technique, keeping his head down the middle of the ball carrier’s body. Upon impact, the tackler shoulders should meet the ball carrier squarely. The tackler then lifts the ball carrier off the turf. Accelerating his feet, the tackler carriers the ball carrier back to the ball carrier’s starting point. The safeties exchange roles and repeat the straight-on tackle drill.
In teaching the angle tackle, the ball carrier, moving again at three-quarter speed directly towards the tackler, cuts to his right. The tackler will again begin chopping his feet. As the ball carrier cuts to the tackler’s left, the tackler steps with his left foot up and inside of the ball carrier’s angle and then quickly executes the one-step explosion with his right foot. The tackler should then make contact with the ball carrier with his right shoulder (same foot, same shoulder force and vector). The tackler’s head should be in front of the ball carrier. His arms should again move from low to high as his hand locks with the opposing wrist. It is essential to note here that if there is no locking of the hand to wrist, the tackler will not be able to control the ball carrier. As the hand and wrist are locked, the tackler’s feet must accelerate with short choppy steps and the tackler’s head is then turned back into the ball carrier. The process is repeated with the ball carrier cutting in the opposite direction. All movement is started on the coach’s command “set,” prior to the “go” command to execute the drill. (See Diagram 2)

Once we have walked, talked, and executed the straight-on and the angle tackles, we go back to the meeting room and talk about progression, of which there are three elements: approach, contact, and finish. To some degree, we have already taught contact and finish. However, we have not discussed approach.
Approach is how we close that distance between the tackler and the ball carrier. The drills we use are “run gather” and “run gather slide.” Again, in the meeting room, we walk and talk the drill first before we do anything else.
On the field for the “run gather” drill, we place safeties four across, five yards apart, and have them run at three-quarters speed on coach’s command toward the numbers on the field. On the coach’s command, players go from a sprinter’s form to chopping their steps while establishing a hitting position. It is important to note that there should be only three choppy steps taken (gathering steps) before the tackler is ready for the one-step explosion used in the straight-on tackle or initial step prior to the one-step explosion same shoulder same foot for angle tackle. (See Diagram 3)

It is also important to note that the “gather steps” should only be nine to twelve inches in length. These steps are used to get the body under control and they enable the tackler to lower his center of gravity, thus giving him a better opportunity to change direction. Once players are properly executing this drill, we move on to the “run gather slide” drill which gives us the footwork for tackling in open space. Again, all drills and their purposes are discussed with the players prior to execution on the field. It is important that the players understand the theory behind the action for optimum execution.
Our safeties are taught that all tackles outside of the box are usually angle tackles. In addition, we really want to take the ball carrier higher especially if the ball carrier is of the same stature or smaller than the tackler. We teach that the more vertical the ball carrier’s approach path is, the more run-gather techniques are to be used. As his angle opens towards us at 15° to 30°, we approach the opponent and, as we start to gather, keep him on a line with our inside eye and begin to gather with a slide technique.

“Real tacklers enjoy making momentum-changing hits.”

The slide technique is a gather at an angle with no more than two steps to be applied. The first step with the foot nearest the sideline is intended to make the ball carrier cut back to the pursuit. The toe is pointed vertically up the filed and the shoulders are nearly square to the line of scrimmage. The second step does not cross over, but instead follows the same path as the first step. Should the ball carrier continue to the sideline, the safety’s outside foot becomes the tackler’s initial step in angle tackling and the trailing foot now becomes the one-step explosion foot. Should the ball carrier attempt to cut back, the trailing foot becomes the initial step and the foot nearest the sideline now becomes the one-step explosion foot. It is important to note that in open-space tackling, we attack the ball carrier higher than we would if he were in the box. On any approach angle that is greater than 35°, the tackler must keep the runner on his inside eye with his head in front of the ball carrier while tracking the runner’s path. The tackler must always force the ball carrier to cut back to the inside pursuit should the tackle be missed.
Once all techniques are defined and well executed, we emphasize the importance of desire. All of the techniques and fundamentals taught and or learned mean absolutely nothing if there is an absence of desire to want to make the tackle. Real tacklers enjoy making momentum-changing hits. They enjoy bringing down offensive players in one-on-one situations. After the hit, the thrill of the adrenalin rush is there, but it is the desire to make it happen using all that has been learned to hit, hit hard and create game-winning opportunities.

Calland ia currently D-line coach at Tennessee State, he previously served as DC at Fort Valley State. Calland was a defensive back in the NFL for ten seasons, including years with the Vikings Purple People Eater defense and the Steelers Steel Curtain defense. p


NEW BOOK!

AFM Videos Streaming Memberships Now Available Digital Download - 304 Pages of Football Forms for the Winning Coach


HOME
MAGAZINE
SUBSCRIBE ONLINE COLUMNISTS COACHING VIDEOS


Copyright 2024, AmericanFootballMonthly.com
All Rights Reserved