AMERICAN FOOTBALL MONTHLY THE #1 RESOURCE FOR FOOTBALL COACHES

Article CategoriesAFM Magazine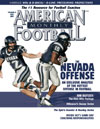
|
Implementing the Sweep Series Packageby: Sam VenutoOffensive Coordinator, Villanova University © More from this issue Growing up the son of a high school football coach, I was exposed to a brand of offensive football that utilizes a series of complementary plays off the same or similar formations, backfield actions, and blocking schemes. The Drive Series or Split- T offense that my father used in our high school combined full flow base runs with the misdirection of counter plays and play action passes. All fit neatly into a system that allowed the offense to keep the defense off balance by countering defensive reaction. Following high school, I attended the University of Delaware, where I played and later began my career in coaching. The Delaware Wing-T, needless to say, incorporated very similar components to the above mentioned Split-T, but tied in the motioning of backs from spread sets to present the defense with a more viable passing threat. A few y....The full article can only be seen by subscribers. Subscribe today!
|

 Digital Download - 304 Pages of Football Forms for the Winning Coach


|
|||||||

| HOME |
MAGAZINE |
SUBSCRIBE | ONLINE COLUMNISTS | COACHING VIDEOS |
Copyright 2026, AmericanFootballMonthly.com
All Rights Reserved