AFM RSS Feed Follow Us on Twitter       
AMERICAN FOOTBALL MONTHLY THE #1 RESOURCE FOR FOOTBALL COACHES
ABOUT |  CONTACT |  ADVERTISE |  HELP  


   User Name    Password 
      Password Help


Article Categories


AFM Magazine

AFM Magazine


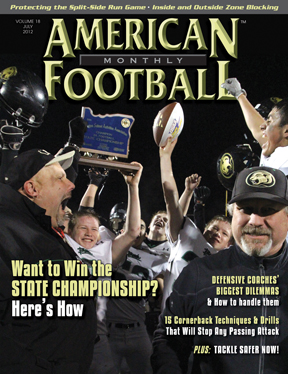
Complete Cornerback Coverage Techniques

by: Patrick Daberkow
Defensive Coordinator Concordia University (NE)
© More from this issue

Click for Printer Friendly Version          

The proper technique for backpedaling is a key to maximizing a cornerback’s coverage.

As with any technique in football, there are a number of ways that standard defensive back techniques can be taught. The core fundamentals of backpedal, break, and bail are often articulated in very different ways. While it is important to put some of your best athletes at the cornerback position, there are always times when you will need to adapt your personnel and teach a corner how to play the position, possibly for the first time. By coaching plant-gather-go, and tilt-point-drive, you can help players understand the footwork of corner play and maximize their ability to perform.

Stance

A proper stance is the foundation from which everything else is built. It is important to consistently stay on your cornerbacks about their stance, as they can tend to get lazy when they aren’t standing nose-to-nose with their read as with other positions. Start with putting the feet shoulder width apart. Stagger the stance so that the outside foot is slightly forward, and the inside foot is slightly back. With receivers putting their inside foot forward, this matches the corner’s leg synchronization with the receivers when the ball is snapped. After the feet are set, the player should sink his hips, and get his pad level down. He shouldn’t get so low with his hips that his abdomen hinders the movement of his lower body, but low enough that if he needed to drive forward, his body wouldn’t have to first sink before springing forward. His back should be flat, and elbows inside, tight to his body. His eyes should be up at his read, and his weight should be on the balls of his feet, not on his heels.

Once your players get into a proper stance when you first teach this, have them extend their arms directly in front of them and put their fingers together. Then, have them keep their arms straight and move them behind and touch their fingers together behind their back. The circle that this movement creates is the area together that their feet should always remain in throughout their backpedal and breaks. If their feet leave this circled area at any time during a play, they are extending too far, playing off balance, and wasting footwork by getting too wide. This visualization can help them understand the physical area where they should work.
Start

When your player starts backpedaling out of his stance, he should by with pushing off of the forward foot. As the ball is snapped, his eyes should be on his read. As he takes the first steps in his backpedal, his pad level and hips should remain at the same height as they were in their stance. Elbows should remain tight to the body. If he is not getting an immediate hard climb by the receiver, the rhythm of his backpedal should be slow for the first three steps, so that he doesn’t backpedal himself out of making a play, or create too much cushion and allow the quick game to open up.

Backpedal

Once in the backpedal, it is important that your player keeps his pad to ensure good balance level, and his overall height, at the same position. His nose should be over his toes, with his back flat, and his hips down. If his nose isn’t lining up over his toes, then his upper body is too high. His back should be straight, void of any arch. If he has an arch in his back, he is likely trying to stay low, but has his hips too high. His feet should skim the top of the grass, with his weight on the balls of the feet so that he can change direction at a moment’s notice.

Arms are often an overlooked aspect of the backpedal. Often a player can have his feet and pad level in perfect form, but his backpedal is choppy and off balance because his arms are in the wrong position. The arms should mimic the legs in synchronization in the same manner if he were sprinting forward. The elbows should always remain tight to his body, and locked at a 90-degree angle. His arms should hinge at the shoulders, and not the elbows. Any time your player’s arm is straight while backpedaling, it likely means his upper body momentum is working against his lower body, ultimately causing a slow and choppy backpedal. By keeping the elbows tight to the body, the player can avoid being thrown off balance and twisting the upper body in different directions than the feet. Another option with the arms is to have your players pump their fists at the same time, and in sync with each foot strike. The most important aspect of the arms is to make sure they are not working against the movement of the lower body. It is vital that players are smooth and fluid in their backpedal, and not choppy and off balance. Upper body and lower body synchronization is key.

Encourage your players to stay in their backpedal as long as they can. As long as they are in the backpedal, all their reads are available to them, and they can break and react to whatever develops. We drill our players daily in their ability to stay in their backpedal for the maximum amount of time.


Break
(forward transition)

When the time comes, and the read dictates, your player will need to effectively and efficiently break forward. Since every second matters, it is vital that there are no wasted steps that take extra time to recover from. It is very important for your players not to get flat-footed, but rather keep their feet firing throughout their break. When a player breaks forward, he should go through the processes of plant, gather, and go.

Plant

When it comes time for your player to break forward, he should plant his back foot immediately. He should do this without rocking back on his heel, and as always, maintain low pad level, and stay balanced, with his nose over his toes. This is a key moment in the transition, where a lot of players will tend to raise up. If this happens, they disengage a lot of their lower body muscle groups that are used to springing forward. By staying low, they maintain their power to spring forward, and can do so at a faster rate.

Gather

After your player plants his foot, he must gather his feet and prepare to spring forward. While gathering the feet and body to move from a back pedal to a forward sprint, it is important that the feet never stop moving. Keep the feet moving like pistons at all times throughout the transition from backpedal to forward burst. On the first gather step, the player needs to strike his foot firmly to further slow momentum from moving back. The second gather step should be shorter (but not parallel) in stride since this will be the base off which the player takes off from. As soon as the second gather step lands, the first gather foot should push off and begin the forward sprint.

Go

When a player has planted, gathered, and begun to transition forward, it is important for them to burst out of the transition. As they burst out, they must focus on pointing the toe in the direction of their target. The first step that pushes off has a tendency to drift outside, creating a lateral movement. Teach your players to make a conscious effort when they push off to point their toe at their target, and move forward, not lateral. The lateral step out of the break is one of the most common missteps in defensive back play. Whether breaking on a receiver in a route, or on a ball carrier, the feet should be attacking, not rounding off to the side. Drill plant, gather, go daily to help this footwork become second nature for your players.

Bail
(transitioning from backpedal to sprint)

The bail transition will be used when guarding deep routes such as posts, or fades. Similar to transitioning forward on a break, there is a three part coaching point for teaching the transition from a backpedal to a sprint down field, or bail. On a hard climb by the receiver, and once the receiver eats up the cushion of the back pedal, it is time to bail. The footwork and coaching points of bail technique are to tilt, point, and drive.

Tilt

Once the time comes to bail, the first step in the transition is the tilt step. To begin the transition, the outside foot in the backpedal should tilt at a 45-degree angle toward the center of the field. In man coverage, point the tilt foot toward the receiver. Just like with the break, the player’s pad level should remain the same throughout the transition, keeping weight on the balls of the feet.

Point

Once the outside foot is tilted, the next step with the inside foot should point to the opposite sideline, parallel with the horizontal lines on the field. This will open up the player’s body and prepare the tilt foot to transition to burst out.

Drive

After the point foot has landed, the tilt foot turns into the drive step. With the knee staying in tight to the body, and the pad level remaining the same, the hips should rotate to the inside, throwing the outside knee over and then landing the foot in line with the route of the receiver; pushing off and driving the body out of the transition and into a sprint. Keeping the elbows tight to the body, and locked at 90-degrees, your players should throw their inside elbow back to aid in getting the upper body turned in synch with the lower body. When bailing on a vertical route, once your player plants his drive foot and begins running vertical, with the receiver, his hand should move to the receiver’s hip at three-quarters arm extension. Three-quarters arm extension is important because you don’t want to get too close, allowing room for a push off by the receiver. If his arm is at full extension when reaching for the hip, then his balance will be off and he will be in jeopardy of falling away from the receiver if the receiver makes a sharp cut.

When it all comes together with the pad level, foot work, arms, and hands in correct form, plant-gather-go and tilt-point-drive will put your players in the best position to make a play. Video your players from the field level to help diagnose problems. Often there are minor details that you can’t see without slow motion that can help make your cornerback more fluid in his technique.
Press Man Technique

With press coverage, the stance is slightly different than in zone coverage. Just like in zone coverage, their hips should remain low, back flat and eyes up, but the hands and feet will have different coaching points. We teach our players to tilt their stance with their hips pointing towards the middle of the field. Our goal with this is to take away any slant routes, and force the receiver to the outside. The outside foot in the stance should be slightly inside the inside foot of the wide receiver. With the stance tilted slightly, there will be no stagger, but the feet should be parallel. The hands should be out in front of their chest and ready to strike. Your player’s eyes should be on the aiming point of their strike. We teach our players to strike the inside number (or breast plate) of the receiver.

When the ball is snapped, your player should keep his eyes on the aiming point. He should buzz his feet and prepare to strike with his hands. Wait until the receiver makes a forward movement before striking, as some receivers will take lateral steps in an attempt to juke and get a clean release. If your player strikes his hands before the receiver is moving vertically, he may miss his target, and lunge out of balance.

Once the WR takes a vertical step, both hands should strike the inside breast plate on the receiver’s shoulder pad. Strike with the thumbs up, and grab the breast plate for a split second, keeping arms at three-fourths extension on contact. Full extension can lead to lunging off balance, and open your player up for a quick swim by the receiver. On a good press, your player should give the receiver a jolt back on contact. This should be a violent, controlled movement. Once the receiver releases (to the outside), the hand closest to the receiver in the jam should wash down to the hip of the receiver, while maintaining contact throughout the release. The opposite hand should be in synch with the foot stride while running. The goal of a press should be to re-route, and slow the receiver from reaching his target. Players need to understand the objective, so they know why the technique is important and how it can be effective. Too often a corner will get in trouble by leaning on the receiver, and getting off balance in his stride because he is trying to stop the receiver from moving altogether. Help him understand the goal so he doesn’t get caught up in lunging and holding.

Once in the route, keep contact on the hip of the receiver with the hand, keeping enough pressure to wedge the receiver off course, without leaning on the receiver. For the first 15 yards of the route, the corner should keep his eyes on his hand that is pressuring the receiver’s hip. This will be a guide for when the receiver breaks off his route or cuts (the first part of the receiver’s body that will change on a cut is his hips). If the receiver sinks his hips, the cornerback should mirror the receiver by breaking down his own hips. When the receiver breaks, the cornerback should stay on his upfield shoulder, never allowing the receiver to get between him and the end zone.

When your player determines that the receiver is running vertically, and his stride is in step with that of the receiver, then his eyes should move to the receiver’s eyes. When the eyes of the receiver get big, then your player should expect the ball. When turning to find the ball, he should always turn his head to the inside so he can maintain stride while he locates the ball. As the receiver’s hands go up for the ball, the hand that was on the hip of the receiver should raise up between the receivers hands to disrupt the pass.

With proper execution of technique, a cornerback who may not be as fast as the receiver he is up against can have success in disrupting and covering any route. Hand placement, and eyes can make up for a speed disadvantage. Give your players the confidence they need to match up with anyone.

Game Plan Reminders

With all of the evolutions of offensive football, it is important to keep an open mind when putting together a game plan. Incorporating corners and defensive backs in the game plan in aspects other than just coverage is important. Many offensive schemes do not account for blitzing defensive backs, and the mere threat of a corner blitz may open up other blitzes and stunts from your linebackers. It’s important not to get so caught up with your own ideas that you miss out on other schemes that could lead to a winning game plan.

DRILLS

Included are three drills we practice everyday to improve our cornerbacks’ coverage:


Confidence Drill


Explanation: Focus on staying in proper backpedal for as long as possible before opening up to bail with a vertical route. When players understand just how long they can carry a route before transitioning, they are more confident and comfortable in their backpedal.


Coaching Points: Begin by taking backpedal steps to read run/pass. Once pass is read, stay in backpedal with proper pad level. Make sure that they aren’t too high in their back- pedal that they become off balance, and not so low that they

are hindering their hip movement. Stay off the heels and on toes, sink the hips, with the back flat, eyes up, and rotating at the shoulders and not the elbows. When it comes time to bail, coach them to tilt-point-drive to transition to a sprint. Every player will bail at different times as it relates to their own ability. The key to this drill is understanding the importance of staying in the backpedal. The only time we should bail is when a WR is climbing vertically and has eaten up the cushion, or when we get in a pursuit mode on a run play.

Record this drill so players can see their mistakes, and so they can track how long they are able to stay in their backpedal before having to bail out. They should know the number of yards that they can typically carry a WR on a vertical route. Have them memorize this number and work to increase it. It is vital that WRs facilitating this drill give the DB the best look possible by sprinting full speed through it.

How it relates to live game mode: The longer we stay in our backpedal, the better our reads are, and the quicker we break on short routes and run plays. Staying in your back-pedal will put you in the best position to make plays, and the longer you’re in it, the better in position you’ll be.


Recover Drill

Explanation: Start in a backpedal, on command make a zero degree break forward. On second command, gather feet and bail out on the same line. Ball will be in the air. Go get it, reaching and jumping to meet the ball at its highest point. Catch the ball with palms facing the ball. Redirect and run the ball back to the starting point.

Coaching Points: Maintain pad level, waste no footwork, take as few steps as possible after the catch to transition your feet from the jump and head back upfield.

How it relates to live game mode: This drill works many aspects of defensive back play – playing low, maintaining pad level, hip transition, high point interception, ball security, and pick transition. Great for safety redirects and corner recovery on routes and reads like a hitch and go.

Varying W Drill


Explanation: Start in backpedal. When the player reaches the cone, he should focus on bursting out of his break, working plant-gather-go, and pointing his toe to the next cone as a target.

Coaching Points: Make sure that players are not taking lateral steps out of their breaks, and coach them to fire their feet as they plant-gather-go, and burst to the next cone. Check for appropriate pad level and ensure that players aren’t rocking back on their heels. Mix the angles of the cones to simulate a variety of cuts.

How it relates to live game mode: A variety of cuts will be used in each game, and it is important for them to have the correct footwork for every cut. By mixing up the angles of the cones, you can efficiently drill all angles to simulate the breaks that a CB will have to execute. Finish with an interception or fumble recovery and running through the coach.

About the Author: Patrick Daberkow enters his sixth season this fall on the staff of Concordia University (NE). He is now in his third season as Defensive Coordinator. Daberkow earned both his Bachelor’s Degree and Master’s from Concordia. He lettered all four years as a defensive back and was team captain in 2006.


Coach Daberkow answers your questions on Facebook - just go to to https://www.facebook.com/AmericanFootballMonthly/


NEW BOOK!

AFM Videos Streaming Memberships Now Available Digital Download - 304 Pages of Football Forms for the Winning Coach


HOME
MAGAZINE
SUBSCRIBE ONLINE COLUMNISTS COACHING VIDEOS


Copyright 2024, AmericanFootballMonthly.com
All Rights Reserved